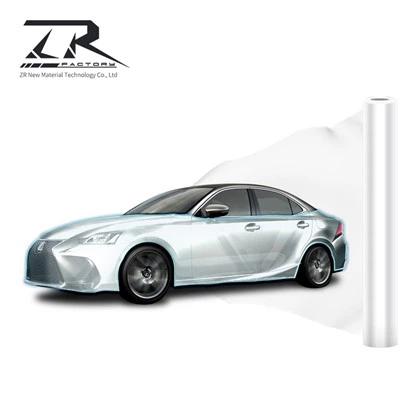
As a leading supplier of anti-scratch car film, I've witnessed firsthand the transformative power of this product in protecting vehicles. Anti-scratch car film, also known as Paint Protection Film (PPF), is a thermoplastic urethane material applied to the painted surfaces of a vehicle to protect it from stone chips, bug splatters, scratches, and other minor abrasions. In this blog, I'll guide you through the installation steps of anti-scratch car film, ensuring you have a clear understanding of the process.
Step 1: Vehicle Preparation
The first step in installing anti-scratch car film is to thoroughly clean the vehicle. This involves washing the car to remove dirt, grime, and debris from the surface. After washing, use a clay bar to remove any embedded contaminants that the wash may have missed. The clay bar will leave the surface smooth and ready for the film application.
Next, dry the vehicle completely. Any moisture left on the surface can cause bubbles or imperfections in the film. Use a clean, lint-free cloth to dry the car, and ensure that all areas where the film will be applied are completely dry.
Step 2: Measuring and Cutting the Film
Once the vehicle is clean and dry, it's time to measure and cut the anti-scratch car film. Start by measuring the area where the film will be applied. Use a measuring tape to get accurate dimensions, and mark the measurements on the film.
When cutting the film, use a sharp utility knife or a pair of scissors. Make sure to cut the film slightly larger than the measured area to allow for some trimming during the installation process. It's also a good idea to cut the film in sections, especially for larger areas, to make the installation easier.
Step 3: Applying the Application Solution
Before applying the film to the vehicle, you'll need to prepare an application solution. The application solution helps to lubricate the surface and allows the film to slide into place easily. You can purchase a pre-made application solution or make your own by mixing a small amount of dish soap with water.
Spray the application solution generously on the surface where the film will be applied. Make sure to cover the entire area evenly. You can also spray the back of the film with the application solution to make it easier to handle.


Step 4: Positioning the Film
Carefully place the cut film on the surface of the vehicle. Start at one end and slowly lower the film onto the surface, using a squeegee or a credit card to smooth out any bubbles or wrinkles as you go. Make sure the film is aligned correctly and that there are no gaps or overlaps.
If you need to reposition the film, simply lift it up slightly and reapply the application solution. The film will slide easily on the lubricated surface, allowing you to make any necessary adjustments.
Step 5: Trimming the Film
Once the film is in place, use a sharp utility knife to trim the excess film around the edges. Make sure to cut the film as close to the edge of the vehicle as possible to create a clean, seamless look.
When trimming the film, be careful not to cut into the paint of the vehicle. It's a good idea to use a straight edge or a template to guide your cuts and ensure accuracy.
Step 6: Removing Air Bubbles
After trimming the film, use a squeegee or a credit card to remove any remaining air bubbles. Start from the center of the film and work your way out towards the edges, applying firm pressure to push the air bubbles out.
If you encounter any stubborn air bubbles, you can use a pin to puncture the bubble and then smooth it out with the squeegee. Make sure to clean the area around the puncture with a clean, lint-free cloth to remove any debris.
Step 7: Final Inspection and Touch-Up
Once all the air bubbles have been removed, take a step back and inspect the installation. Check for any imperfections, such as wrinkles, gaps, or uneven edges. If you notice any issues, make the necessary adjustments and touch up the film as needed.
Finally, clean the surface of the film with a clean, lint-free cloth to remove any fingerprints or smudges. The anti-scratch car film is now installed and ready to protect your vehicle.
Additional Tips and Considerations
- Work in a Clean Environment: It's important to work in a clean, dust-free environment to prevent dirt and debris from getting trapped under the film. If possible, work in a garage or a covered area.
- Use the Right Tools: Using the right tools, such as a sharp utility knife, a squeegee, and a measuring tape, will make the installation process easier and more accurate.
- Take Your Time: Installing anti-scratch car film is a meticulous process that requires patience and attention to detail. Take your time and don't rush the installation to ensure a professional-looking result.
- Seek Professional Help: If you're not confident in your ability to install the film yourself, consider seeking professional help. A professional installer will have the experience and expertise to ensure a flawless installation.
Conclusion
Installing anti-scratch car film is a great way to protect your vehicle's paint and keep it looking new for longer. By following these installation steps and tips, you can install the film yourself and save money on professional installation costs.
If you're interested in purchasing anti-scratch car film, we offer a wide range of high-quality products, including Car Window Solar Film Tint, PPF Car Protection Film, and Car Protection Film Self Healing. Our films are designed to provide superior protection against scratches, chips, and other damage, and are easy to install.
If you have any questions or would like to discuss your specific needs, please feel free to contact us. We're here to help you find the perfect anti-scratch car film for your vehicle and provide you with the support and guidance you need throughout the installation process.
References
- "Paint Protection Film Installation Guide." XPEL.
- "How to Install Paint Protection Film." 3M.
- "Anti-Scratch Car Film: A Comprehensive Guide." AutoZone.